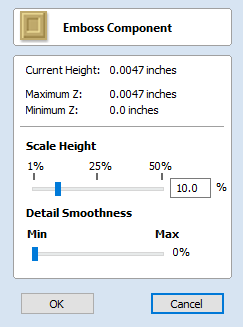
Emboss Component

Embossing a component can be used in some cases to reduce the height of a model while preserving important surface detail as an alternative to the standard method for scaling a components height using the Shape Height option on the Component Properties form.
A component must be selected before the tool can be used. Use the Scale Height slider to adjust the final height of the component. Since the results of the initial detail scaling can be noisy the Detail Smoothness slider can be interactively adjusted to improve the visual quality of the result. In general, the greater the Scale Height the more Detail Smoothing needs to be applied.
The images below show the same model, both results are scaled to ten percent of their original heights. The image below left was created using the standard Shape Height scaling from the Component Properties form and the image below right using the Emboss function.
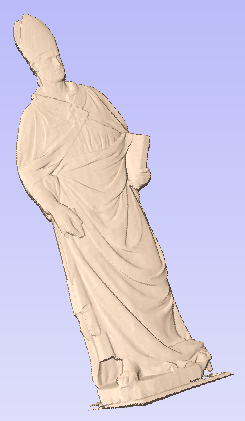
Original model
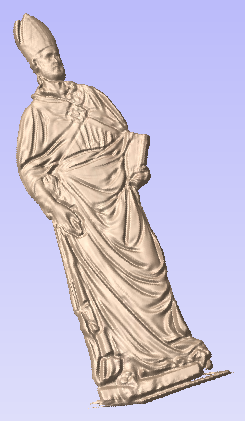
Embossed Model
The Emboss tool is a very powerful feature but will not provide ideal results on every type of 3D model. Although it's possible to use the Emboss tool on models created in Aspire and other low-relief imported designs (such as the clipart), it's important to understand its intended use is with data from imported, full 3D (high relief) models and typically the best results will be obtained with this type of data.